![]()
|
|
|
|
|
|
|
| Prepare
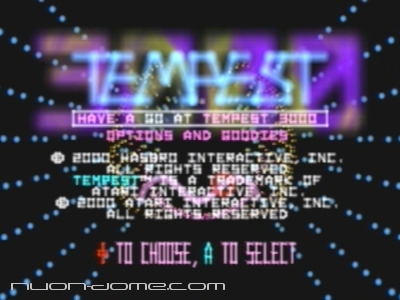
to Enter the Web The Unofficial Guide to Tempest 3000 By Jeff "Yak" Minter
Here I shall present a general overview of Tempest 3000, a description of the enemies you will meet during play, and finally some general techniques for exploiting features of the game's design to maximise your enjoyment and your score.
Tempest 3000 Play Environment: The action takes place on a neon Web floating in virtual space. The Player is represented by a yellow Claw which scuttles around the top edge of the Web (the Rim). The joystick moves the Claw along the Rim; the A button fires or changes the nature of the player's Shots; the B button triggers the "Superzapper" weapon. The Right Shoulder button is used to activate and maintain Hover Mode, which allows the Claw to hover above the Rim for a length of time determined by the amount of Fuel that the Claw has. The Web is divided into sections called Lanes. Player Shots travel down the Lanes, and various Enemies and enemy Shots travel up the Lanes towards the Rim. Webs come in two flavours - Connected webs, where all the Lanes are joined in a closed loop, which the player can spin around at will; and Disconnected webs, where the Lanes are not joined in a loop, and the Claw's motion is therefore more constrained. In some Webs there are green Spikes in the Lanes. These Spikes can be shot away using normal Shots (Homing Missiles do not damage Spikes). Some Enemies create new Spikes, or extend existing ones upwards towards the Rim. The Enemies are distantly visible as a swarm of dots beyond the far edge of the Web. Dots that detach from this swarm and approach the bottom edge of the Web are called Embryos. It is important to look out for the Embryos, because then you can see which Lane the Enemy is going to land in, and maybe send a few Shots down there to greet him as he lands :-). The colour of the Embryos will also give you a clue as to which *type* of Enemy is going to land there - which can be very important to know when dealing with the likes of Pulsars and Frank Zappers! A Level ends when all the Enemies have been destroyed *or have reached the Rim*, and there are no more Embryos left. At the level's end, the Claw accelerates down the Web before zooming through space and eventually landing on the next Web. Players should take care, though, because it is possible to be killed whilst transitioning off the Web, if one runs into a Spike! Therefore it is safest when leaving a Web to remain in your Lane and keep firing normal Shots as you zoom over the Web's surface.
Tempest 3000 Powerup Sequence: Every so often, a destroyed Enemy will engender a Powerup. These consist of joined rings of particles, and you should consider them to be like a cylinder in shape. Powerups float up the Web towards the Rim. The Claw can collect a Powerup either by waiting in the Powerup's Lane until the Powerup hits the Claw, or by crossing over the Lane containing a Powerup as it emerges over the Rim. If the Claw passes through the cylindrical space of the Powerup's body as it passes over the Rim, then the Powerup will be collected. Each Powerup increases the power of the weaponry of the Claw, adds one extra Shot to the total number the player can fire simultaneously, increases the Bonus Multiplier, and also provides extra Fuel capacity for Hover Mode. The sequence of the powerups is thus: 1: enable Auto Shooting. The Claw fires continuously, without the player having to hold down the Fire button. 2: enable Homing Missiles. If the player holds down the Fire button, Homing Missiles are fired. These Missiles can cross over into nearby lanes, and tend to seek out enemies. They are useful for nailing dangerous enemies such as Pulsars and Frank Zappers without having to be in the same Lane as them, and also for shooting enemies that would be obscured by Spikes. Homing Missiles are unaffected by Spikes and pass right through them. This is handy, but it does mean that Homing Missiles don't nail down Spikes, though. Since Auto Shooting is already enabled, letting go of the Fire button switches back to normal Shots. This is useful for nailing down Spikes, or for when you want your firepower concentrated only into the Lane you are in. 3: enable Remote Destroyer. This activates the Claw's best mate, a glowing, particulate entity which helps with the job of killing the Enemies. The Remote Destroyer alternates between two modes of behaviour. It floats above the Rim, looking for enemies and raining Normal Shots down upon them. Periodically it will zoom down into the Web, chasing enemies, and killing them upon contact. The Remote Destroyer is "your particulate pal who's fun to be with". 4: Warp Up/Warp Enable. This Powerup enables the player to gain access to the Bonus Round, a special stage in which the player has the opportunity to collect extra points at no risk to himself. To enable the Bonus Round access, players must collect three Warp Up/Warp Enable powerups. When the third one is collected, the Bonus Round is enabled, and will occur when the player travels in "space" between the current Web and the next one. 5: Bonus. This Powerup must be collected to increment the Extra Bonus that players get at the end of a Level.
Hover Mode Hover Mode is available to the Claw after the first Powerup has been collected. If there is Fuel available, pressing and holding down the right Shoulder Button will cause the Claw to thrust away from the Rim. If there is sufficient Fuel, the player can effectively hover and manoeuvre above the Rim, enabling him to evade electrified Lanes due to Pulsars, nail down or jump over Spikes that poke out above the Rim, and evade and attack any Enemies that have reached the Rim. Whilst Hover Mode is in use, Fuel is used up, and when all the Fuel is gone the Claw drops back down onto the Rim. (The amount of Fuel available is shown by the gauge underneath the player's score in the top left of the screen). Back on the Rim, Fuel regenerates, and after a short while is replenished. The Fuel capacity of a virgin Claw is zero, which is why Hover Mode is unavailable until the first Powerup has been collected. Each additional Powerup collected increases the Fuel capacity. After one Powerup, the Claw only has enough Fuel to perform very brief "hops" from the Rim. After five Powerups, there is sufficient Fuel capacity for sustained hovering flight over the Rim. Note that some Enemies can shoot Shots that travel beyond the Rim, or can move beyond the Rim themselves. These enemies can kill the player even whilst in Hover Mode.
Bonus Round: If the player successfully enables it by collecting three Warp Up Powerups, he will begin the Bonus Round at the end of the Level on which he collected the third Powerup. During the Bonus Round, the player cannot actually lose a life. The Bonus Round challenges the player with a series of dexterity tests - the player must steer down an abstract "course" without failing. Should he complete the course flawlessly, a large bonus is awarded, and two levels are skipped. Failure terminates the Bonus Round early, and the player gets less reward, but does not cost the player a life in the main Tempest 3000 game.
Tempest 3000 Enemies: The following is a list of the enemies in T3K, along with a brief description of their behaviour. Flipper: The basic Tempest enemy. Flippers are quite dumb, but can be a nuisance if they are overlooked whilst fighting other enemies and they sneak up to the Rim. Flippers start up by riding up the Lanes, and then they start to "walk" around the Web with the characteristic flipping action that gives them their name. They threaten the player in two ways - they fire Shots which can kill the player, and if they catch the player once they get to the Rim, they drag him down into the centre of the Web to an unknown fate (which we can only assume is worse than death). Sussed Flipper: A little smarter than their stupid cousins, Sussed Flippers know enough to aim the direction of their motion across the Web deliberately towards the player. Stealth Flipper: These little buggers aren't any more hostile than your average Flipper, but they fade in and out of visibility. When they are moving fast, and you are battling other threats on a busy Web, this behaviour can be unsettling, because one tends to lose track of them, and next time you notice them they're at the Rim. Keep an eye on the little bastards, and nail them early for the sake of peace of mind. Fuseball: Fuseballs are at first glance quite unthreatening. They don't fire at the player at all, and spend most of their time lurking somewhere down the Web, where they can't even kill him by contact. However, Fuseballs hang out on the strands of the Web that define the edges of the Lanes, and while they are there they can't be shot (except with Homing Missiles). If they are not promptly dealt with, then eventually they will land on the Rim, where they do present a threat to the player, since they restrict his movement upon the Rim, and can only be killed by using a Superzapper, or using the Hover powerup, or through the tender ministrations of the Remote Destroyer. Flipper Tanker: Flipper Tankers are not in themselves aggressive; they can't kill the player except by contact, they don't move evasively, and they don't fire Shots. Flipper Tankers are the troop transports of the Tempest world. When shot, or when they reach the Rim, they disgorge a cargo of two or more Flippers into the adjacent Lanes. Be aware when you shoot one open, and ready to mop up the Flippers that materialize when the Tanker is opened. Fuseball Tanker: Similar in shape and behaviour to a Flipper Tanker, except that they disgorge Fuseballs upon being opened. Rotor: Rotors are actually quite harmless. They simply oscillate up and down the Web, moving slowly across the Lanes. And yet they are enemies which can make life very difficult for the player. This is because if a Rotor is on the Web, it will cause the entire Web, and everything on it, to begin rotating in space. This can be very disorienting to the player, especially if you are trying to pussyfoot your way through a herd of Pulsars at the time! Each Rotor adds its own component of "spin" to the Web; where multiple Rotors are on the Web at the same time, these "spin factors" add up. Nail them to restore the Web to a sane equilibrium! Spiker: Your basic Spiker builds Spikes up from the bottom of the Lanes towards the Rim. Spikes can be dangerous, because if you hit one whilst transitioning off the Web, you'll be impaled and have to start the Web over! Shoot Spikers early, and nail down the Spikes with Normal Shots (Homing Missiles won't destroy Spikes). Keep firing Normal Shots as you transition off the Web, and stay in your Lane, and you should be safe from Spikes. Spikers also fire Shots at the player. Super Spiker: These behave as normal Spikers, with the important exception that they can extend the Spikes *above* the level of the Rim, presenting big problems for the player's mobility. Shoot them before they reach the Rim! If the worst happens, and a Spike pokes up above the Rim, use the Hover powerup to overfly the Spike and nail it down using Normal Shots. Hardened Spiker: These behave the same as Super Spikers, except that they build special Hardened Spikes, which require a lot more than the usual amount of Normal Shots to nail down. Don't let the Hardened Spikers make Spikes that are too long! Multi-Spiker: Possibly the most scary of the Spiker clan! These Spikers are capable of building Spikes in *every single Lane on the Web* simultaneously! You *must* shoot them before they reach the Rim, or no matter where you are, you will be impaled! Pulsar: Nobody likes a Pulsar. Their behaviour is extremely uncouth and rude, and they smell. And they are extremely dangerous! Pulsars expand and contract in a regular rhythm, and when fully-expanded, they electrify the Lane that they are in on the Web. If you happen to be at the top of that Lane, or passing by it, then you will be zapped by a stonking great lightning blast up the arse! A herd of Pulsars on the Web is a bit like a load of women sharing a house - their periods are synchronised! And boy, to these suckers have a bad case of PMT! So be aware of the locations of Pulsars on the Web, listen out for their rhythm, and time your attacks accordingly. And *never* be around when a Pulsar lands on the Web - it may land in the active phase, and fry you instantly! Listen for the warning "Pulsar Landing!", and watch the Embryos to see where the Pulsar is going to land (Pulsar Embryos are bright and flashing, and therefore easy to see). Make sure you are elsewhere when the Pulsar lands on the far edge of the Web. Homing Missiles are a great balm to the anxious player when Pulsars are around, because they can kill the little shits without the Player having to go into the same Lane as the Pulsar. Apart from their antisocial electrical behaviour, Pulsars behave a lot like Flippers, marching around the Web with an air of ill intent. I bet Pulsars are all neo-Nazis and have pictures of Adolf Hitler on their bedroom walls, the little sods. The only good Pulsar is a dead Pulsar, so fire away, or consign them to hell with a nice meaty Superzapper, or cackle madly as your Remote Destroyer swoops down the Web to spoil their day! You can fly over an electrified Lane if you have the Hover powerup, so use your extra mobility to rain evil death on the little buggers from above! Never, ever allow a Pulsar to reach the Rim. Should one do so, you will be electrocuted immediately. Rimstalker: These small, shy, semi-translucent enemies exhibit sly and beastly behaviour. They attempt to scuttle away from the player, and then, when he is preoccupied elsewhere, Rimstalkers move up towards the Rim. They can destroy the player by contact, or by firing a type of Shot that doesn't end at the Rim, like normal enemy Shots do. Rimstalker Shots fly up off the edge of the Rim a ways, and so they can actually catch an unlucky player even in Hover mode. Rimstalker-Bomber: Rimstalker's psychotic brother. Exhibits the same devious lurking behaviour, except with one important and deadly difference. When the Rimstalker-Bomber reaches the Rim, it releases a pair of Fireballs which begin to oscillate along the Rim. If this happens, and you have no Superzapper or Hover powerup, then you are grilled bread. Since Rimmys are shy and like to lurk away from where the player's attention is focused, it is possible for this terrible event to happen just when you least expect it. When the Fireballs are released, you will hear an audio warning: "Warning. Extreme danger". If you hear this, immediately void your bowels, Superzap or get ready to Hover immediately, or you will be exploding yellow vectors! Unmaker-Spider: Unlike nice Earthly spiders, Unmaker-Spiders don't build Webs; they mess them up! These enemies disrupt the player's life my meddling with the very structure of the Web itself. They disconnect Webs that are connected, and they fold up the Lanes of the Web, making it hard for the player to see where he's going. Shoot the Spider, and the injured Web will swiftly heal itself. These Spiders also fire Shots. Shoot them quickly and keep the Web in decent shape! Space Ox: These Oxen are big and ugly, and quite literally horny. but if tackled correctly, they aren't too much of a threat. They lumber around across the Web, getting in the way and obscuring the player's vision. They are mostly harmless, provided you shoot them in the correct way. Try not to shoot them "in passing" - position yourself squarely in the Ox's lane and blast him with a solid stream of bullets. When shot, the Ox will first fire both his horns at you before he expires. The horns themselves can be shot - so to remove an entire Ox takes *five* shots - one shot to remove each horn, one shot to finish off the Ox, and one shot each to shoot the horns. The danger of Oxen lies in not finishing them off in one go. If you shoot a couple of shots at an Ox and move away, then the horns will be flying up the Lane, where you might accidentally bump into them shortly afterwards. The horns fly up off the edge of the Rim, too, so they can even catch you whilst you are hovering. It is also dangerous to shoot Oxen using the Superzapper. Whilst the Ox itself will be destroyed by the Superzapper, the horns are invisible to it, and can only be destroyed by player Shots. If you Superzap a Web containing a lot of Space Oxen, then there will be ox-horns flying everywhere, which could get dangerous. Frank Zapper: This new style of deadly enemy was born when a stinking Pulsar had unnatural intercourse with a genetically-modified Flipper. They look innocuous enough, moving much like Flippers do, and at first sight they don't seem to have inherited the nasty electrical behavour of the Pulsar. However, they are extremely lethal enemies. They take several shots to kill, and with each shot that hits them, they emit a massive lightning bolt up the Lane they are in! So if you try and shoot this bad guy face-to-face, you will die, instantly. Kill them by swinging by and lobbing down a shot or two, making sure you've moved off the Lane before those shots hit Frank. Rinse and repeat until he is dead! Take care when Superzapping a Web containing Frank Zappers. They will all emit deadly lightning as the Superzapper does its thing, so make sure you don't move into their path! Thrombosis: Like their real-life counterparts, Thromboses cause trouble by causing a blockage... not to the player's aorta, but to the Lanes of the Web. Left alone Thromboses are completely harmless to the player, except by contact; they just drift slowly up their Lane, pass up off the Rim, and dissipate in the space above the Rim. They can be destroyed with six shots. But... and it's a but as big as Flossie's arse... *each shot that hits them doubles their speed up the Web*. So if you face them out, make sure you do it before they get too close, or they will literally fly in your face and kill you! Coronary Thrombosis: This is a Thrombosis with serious life-threatening complications! They behave as an ordinary Thrombosis, doubling their speed each time they are shot at; but they also release indestructible Platelets which fly up the Lane towards you! They also confuse the hell out of your Superzapper, which will quite likely lock on to a Platelet, which can't be destroyed - wasting precious Superzap time. Best simply avoided, if possible, until they expire safely above the Rim.
From the Ox's Mouth: How to Stay Alive and Score Bigtime in T3K Tempest 3000 isn't much of a game for strategy. There's no careful management of resources or need for tactical planning here, matey. We're firmly in shoot-anything-that-moves territory here. But there are a few techniques which you might not be aware of which can prolong your immersion in the trance-like "Zone" state which is the Nirvana of Webheads, and maximise your scoring potential (in the game, that is. I'm not going to claim that any of this is going to increase your ability to cop off with your favourite species and gender or anything). Don't Use Your Superzapper. That may sound like odd advice - you get one shiny new Superzapper per level, so why not use it to take the load off once in a while? The answer to that lies in a basic tenet of videogame design - tempt the player to take risks in return for big points. You will notice in the top right of the game screen a Bonus Multiplier. Each new level this starts at x1. Every powerup you collect increases it, to a maximum of x5. Running at x5, everything you score is multiplied by five. Therefore it behooves you to get the Multiplier up as high as you can as fast as you can, and keep it there. Points rack up much more quickly, and Extra Lives accumulate faster. But if you Superzap (or use that other "escape" technique, Hover Mode) the Bonus Multiplier gets reset to x1. So if you hang in there, keep your sphincter clenched and tough it out, refrain from the temptation to Superzap or Hover and rely instead on your own skills (and those of the Remote Destroyer) to defend yourself, you could end up with lots more points and Extra Lives. You must balance this against the risk to your existing life that arises from not Superzapping your way out of a situation that is getting scary. There is another reason not to Superzap: for up to eight consecutive levels, if you complete the level without Superzapping, a small amount of time is added to the Superzapper's duration. If you go eight levels without a Superzap, when you do eventually call on that weapon, the duration of the Superzapper discharge will be approximately twice what it usually is. After you Superzap, this increased duration is reset to normal, and you can start accumulating it again over the next eight levels.
Don't Miss Your Powerups. You don't want to miss any Powerups. If you do, then you won't get the end-of-level Bonus. If you don't get your Powerups, you can't have any Bonus. How can you have any Bonus if you don't get your Powerups? ;-). There are other good reasons for not missing Powerups. Not only are the Powerups useful in themselves, collecting them also augments your Shot capacity, increases your Fuel for Hover mode, increases the Bonus Multiplier, and makes the possibility of scoring more points (and skipping levels) via the Bonus Round more likely.
Go Out With Flossie. Sometimes, just as a level is ending, a Powerup is released just as you start to zoom down the Web. You should do your best to try and collect it. Not only will you have the aforementioned advantages of not missing Powerups in general, you'll get a little extra treat: you'll get to hear Flossie bleating madly as you zoom away into hyperspace. And Flossie rewards you on the next level with continuous fire. You begin the level with the maximum possible Shot capacity. This allows you to lay down a much more dense pattern of fire than is usually possible. So, when you leave a level, if the opportunity presents itself, grab that Powerup and go out in style - go out with Flossie :-).
Use Contextual Cues. When you're on a busy Web, the enemies are everywhere, and you're naturally enough trying to concentrate on getting the job of saving the Universe done, it's sometimes difficult to keep track of certain significant events that may affect your situation but which are happening on a section of the Web where your attention is not currently focused. The game provides various contextual cues for some of those events which are perceptible using periperal senses, without having to take your attention away from the job in hand. These cues are both auditory and visual. Pay attention to the sounds of the game - they provide feedback about upcoming events and overall status. Listen for the "Pulsar Landing" and "Tanker Open" cues and be ready to take extra care. Strobes in the background also provide information. Shooting a Pulsar causes a distinctive yellow screen strobe. Often you want to pass over a Pulsar on the way to somewhere else, and hope that you can shoot it as you pass by. You don't have to be looking at the Pulsar to know you nailed it - you can be concentrating on whatever you passed over the Pulsar to get to, and that yellow flash will tell you that you did indeed get that Pulsar on the way (and therefore that it's safe to move back over the place where he was). A screen flash will also tell you when you have successfully collected a Powerup. Likewise on a Web infested with Frank Zappers, you will also by necessity need to shoot them in passing. Listen for the distinctive sound of the Zapper discharging as the first shot hits. Then you know you're safe to go back to the Zapper's lane and finish him off.
Maximise your Bonus Round earnings. How much you score in the Bonus Round depends on a variety of factors. First and foremost, of course, you need to actually complete the Bonus Round in order to get really big points. But accuracy is important too. The closer you are to dead centre of each ring as you pass through, the more points you will score for that ring. In the first Bonus Round, for example, it is possible to score over 100,000 points with accurate flying. Generally you should avoid firing in the Bonus Rounds. Firing does two things that are useful, though - it rapidly slows down your lateral motion, which is useful if you're going too fast and it looks like you're going to overshoot a ring. Shooting rings also opens out narrow rings, making them easier to get through. But you score less points for wide rings, so if you can fly accurately without firing, you'll get much more points. By all means fire though if it means the difference between staying in or going out of tolerance.
Shoot everything yourself. Powerups are engendered according to how many things you shoot. Only things that you shoot count towards Powerup generation. So if you let the Remote Destroyer ram enemies, those enemies don't count towards making a Powerup. To maximise the Powerup potential of any level, try and shoot as much as you can in person. On levels where there are fewer enemies, take the time (and risk) to shoot out enemy Shots as well as the enemies themselves. Those shot Shots count towards Powerup generation, and you can therefore squeeze more Powerups out of a level that, by enemy density alone, might not otherwise contain many Powerups.
Take advantage of Oxen. No, I don't mean get a lonely and vulnerable Ox drunk, tell it that you love it, get it into bed and have your wicked way, and then abandon it in the morning ;-). The thing is that levels with Oxen usually yield a lot of powerups, given that each Ox releases two Horns for you to shoot, and as mentioned in the previous tip, everything you shoot goes towards making Powerups. On levels with large herds of Oxen, you can virtually guarantee that you will get all the Powerups, right through to Warp Up. You can actually use this to your advantage in the later levels, if you have a good supply of Extra Lives. Sometimes it can be worth using the Oxen to get the Warp Up powerup, then deliberately dying and re-playing the same level, getting another Warp Up, and so on, until Warp is enabled. Then you can finish the level properly and use the Bonus Round to skip over subsequent levels which may have cost you more lives than the couple you sacrificed to jump over them...
Optimize your neural and physical environment. T3K is a game which, on the higher levels, has so much going on that it demands that one put oneself into an almost trance-like state of concentration in order to be able to assimilate all that is going on and deal with it effectively. Players call this state "the Zone", and getting there is the real point of playing a game like T3K in the first place :-). You won't be able to get there if you're distracted by peripheral discomforts such as a sore arse or glare on the screen. So preferably, play T3K in a totally darkened environment. Make sure your posture is comfortable and not such that various bits of your body are going to start going numb through lack of circulation. If you can, crank out the audio through a loud and decent stereo. Teach your dog to respect the fact that people playing videogames are not to be licked or presented with dog toys. Train your mates to provide you with tea and any other sustenence that you require quietly and without getting in front of the screen. Turn off the phone whilst you are immersed. Use whatever means you find most effective to cultivate a neural state that is comfortable and conducive to the enjoyment of a trance-like experience. I hope you will enjoy your trip to the Zone :-).
\ (:-) - Yak 23/10/2000 / |
|
| NUON-Dome and its contents are © 2000-2023 Kevin Manne and Wes Powell. All Rights Reserved. Reproduction of any content, writings or images, in whole or part, without permission is prohibited. NUON(tm) and the NUON logo are trademarks of Genesis Microchip, Inc. All Rights Reserved. This website is not affiliated with Genesis Microchip, Inc. | |