
![]()
|
|
|
|
|
|
|
| Hacking
your Logitech Gamepad Disclaimer: I am not responsible for any damages that may occur as a result of following the instructions below. Opening up your controller will void the warranty. Proceed at your own risk. Method #1 by Kevin Manne:
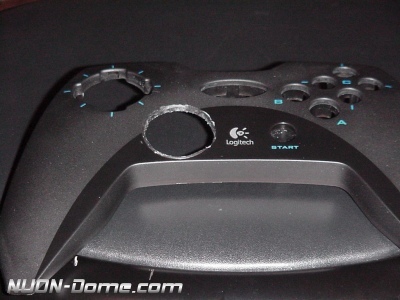
The problem with the analog response on the Logitech Gamepad for NUON doesnt stem from the analog stick itself, but rather the front face of the controller itself. Using the analog stick outside of the case allows full freedom of movement for the stick, which gives the best response. The case actually prevents the stick from achieving the maximum value. So how do we go about fixing this little problem? Well, make the hole bigger, of course! But how? Heres what youll need: 1. 1 small Phillips-head
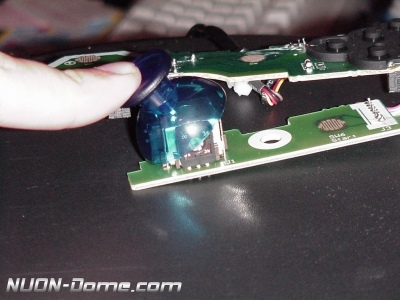
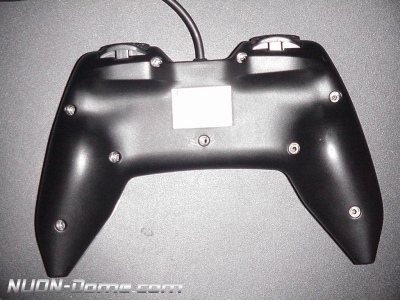
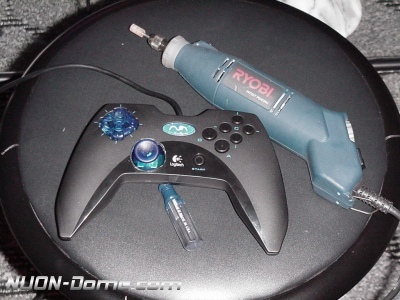
screwdriver First youll need to get this sucker open. Take the screwdriver and remove the 9 screws from the back of the controller. 8 are easily visible and one is hidden behind the QC Passed sticker in the middle. Once all 9 are off, remove the back cover and set it aside. Inside youll see 2 boards, labled Brumby Main Board and Brumby Joystick Board. Youll need to remove these 2 boards (take the controller cord out of the slot at the top), and set them aside. Now get all the buttons out of the face of the controller and youll be left with the bare plastic. Now the fun begins. Get your Dremel-like tool and get a sanding bit for it (I used a small grinding-stone like bit). Begin by sanding down the ridge around the hole and continue to slowly widen the hole. I stopped a few times during the process to reassemble the controller and see how the analog stick reacted. 2 or 3 times and the hole was wide enough to allow maximum movement. Re-assembly can be a bit tricky, as theres only one way that everything will go back together properly. All the buttons are different, as there are small slots in the housing that the buttons need to fit into. Also, the D-pad has to go in the correct way, otherwise it will be all out of whack when you reassemble it. Be sure to put the Main Board back in before putting the start button back in its slot, and then put the joystick board in last. Put the back of the casing back on, screw the 9 screws back into the controller and youre ready to go. Throw in T3K and youll see that the claw whips around the web at the same rate when using either the analog or the digital controls. Merlin Racing will control as it was intended. Youll now have the ultimate controller for FreeFall. Happy analog-gaming!
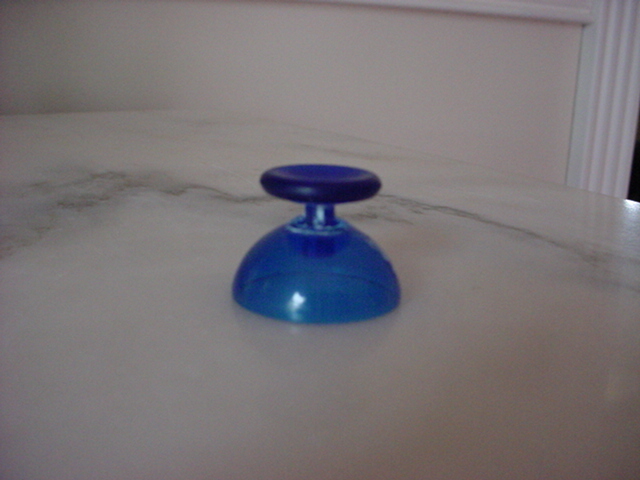
Method #2 by Chad Tindle: Please read through these steps and examine your game pad and the blue joystick piece before starting. This will give you a better idea as to what exactly you are trying to accomplish. Basically the analog stick is too fat which causes it to hit the outer casing of the game pad before the full analog range has been met. These instructions will describe how to remedy this problem. 1. Begin by removing all the screws from the back of the game pad, there is also one hidden behind the QC passed label. 2. With the game pad facing down, remove the back cover, this way the buttons and other components wont fall out. Pull the smaller board labeled brumby joystick board upward so that you can get to the analog stick. 3. Carefully pull outward on the blue joystick piece to remove it from the analog module. Do not twist the stick, the stick is not screwed in! 4. Now that you have the blue joystick removed you will need a very sharp, small and non-serrated knife to carve into the stick. If you look closely at the joystick you will notice a smaller cylinder within held to the outer cylinder by four small walls. You want to remove the outer cylinder and walls so only the inner cylinder is left. Begin by slicing straight into either edge of the outer cylinder next to the thumb piece or the bowl shaped piece. You want to slice into both sides until your knife is touching the inner cylinder. Dont cut into the inner cylinder! Also do not apply too much force. You dont want to slip and gouge out an eye or even worse, lop of your left thumb, rendering this mod useless. 5. Before you begin this step you might want to cover the bowl shaped piece of the joystick with tape so you dont scratch it up. Begin carving out the outer cylinder by slicing at an angle from the bottom edge near the bowl shape of the joystick upwards towards the thumb piece. In this manner you should be able to remove the outer cylinder and walls leaving only the inner cylinder. This step can take awhile so be patient. 6. After you are done you might want to sand the rough edges with a small strip of fine grit sand paper. Reassemble the pad and enjoy. If you still have any questions email me at chadt@bardstown.com
|
|
|||||||||
| NUON-Dome and its contents are © 2000-2023 Kevin Manne and Wes Powell. All Rights Reserved. Reproduction of any content, writings or images, in whole or part, without permission is prohibited. NUON(tm) and the NUON logo are trademarks of Genesis Microchip, Inc. All Rights Reserved. This website is not affiliated with Genesis Microchip, Inc. | ||||||||||